
There are two parts to updating the navigation! Since this theme is a single page, there are a few extra steps to take to update your navigation — but don’t worry, it’s relatively simple!
Assign Links to Your Sections
Firstly, we need to assign a name (link) to the sections you want the navigation to jump to. By default, you’ll notice the navigation jumps to the following sections:
- Welcome (top of the page)
- Our Story
- Photos
- Schedule
- Travel + Accommodations
- Q+A
- Registry
- RSVP
Now, let’s get started!
- Open the page editor, then scroll down to the section you want to add/edit a link for.
- At the top toolbar, click on the icon with 3 horizontal lines, next to the i icon. You’ll notice the sections named above are indicated in this list.
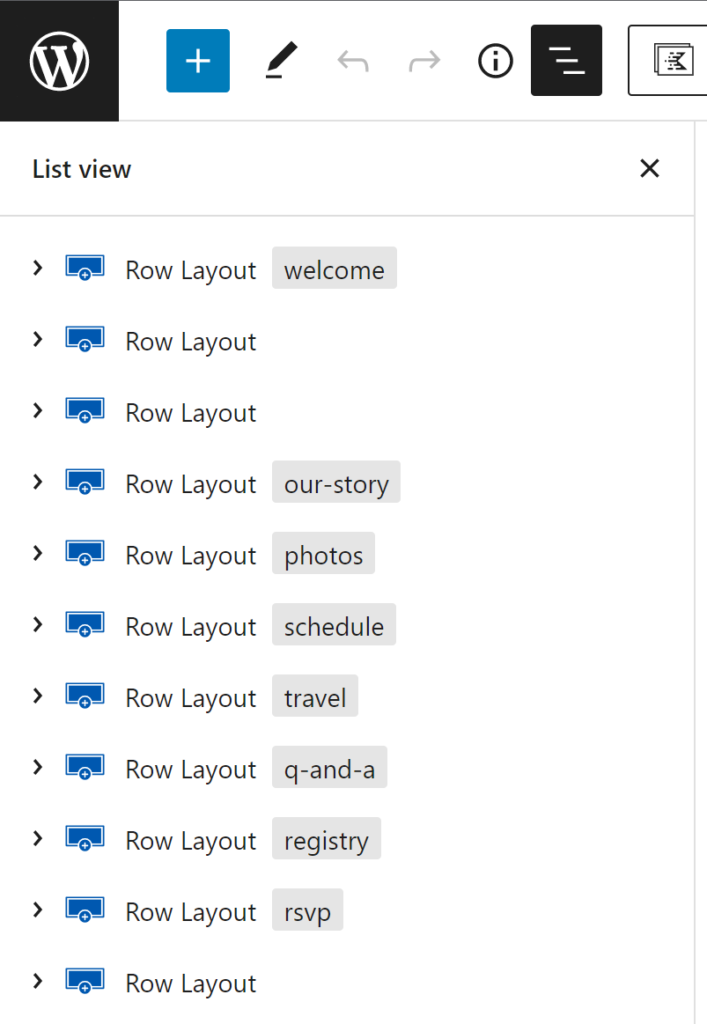
- For this first example, let’s update the “travel” link to “hotels”. Click on the Row Layout travel from the list.
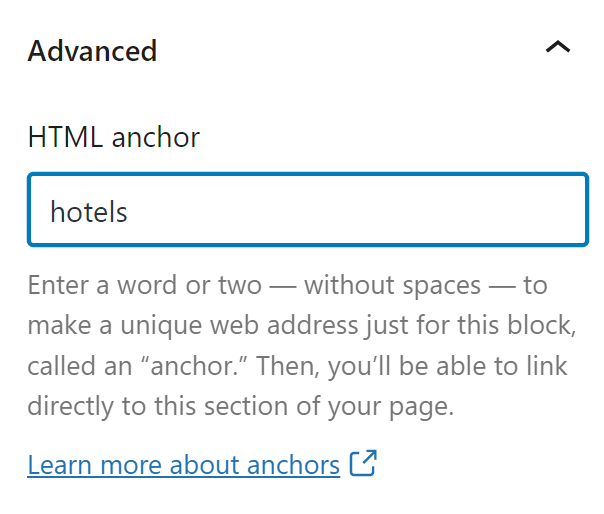
- In the right sidebar, locate the Advanced section, at the very bottom and open it.
- In the textbox under HTML Anchor, change it to what you want to update the link to. In this case, we will change it to hotels.
- Repeat this for as many sections as you wish, then save your page.
- Go back to the admin dashboard.
Update your Navigation Menu
- In your admin dashboard, go to Appearance > Menus.
- Locate your main navigation menu to edit it.
- We updated the link for Travel + Accommodations, so click on it in the menu.
- Replace #travel with the new link, #hotels.
- It is crucial that you keep the hashtag (#) in front of the link, or it will not work!
- Now save your menu!
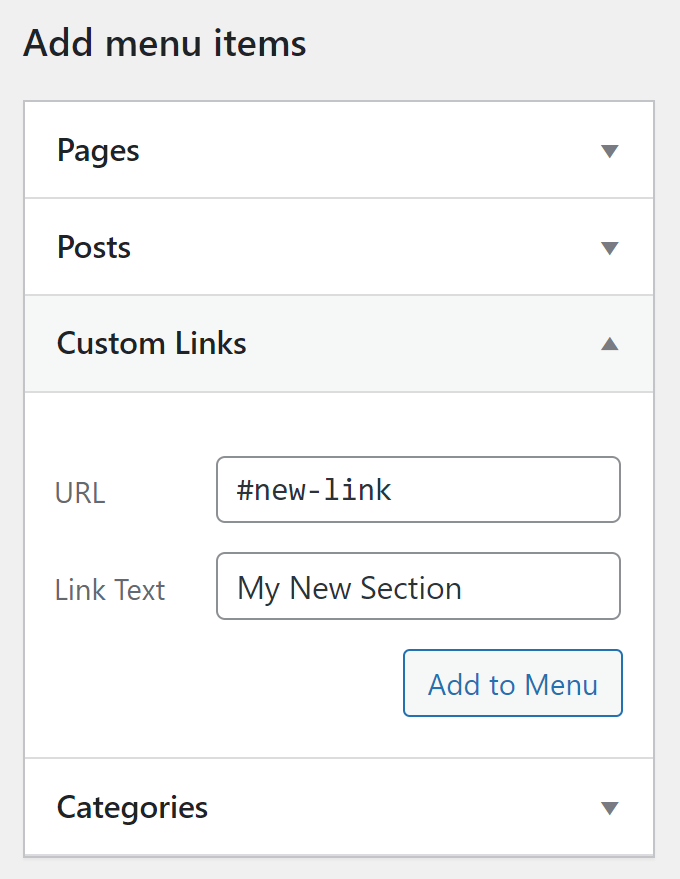
- To add new links, click on Custom Links in the left sidebar.
- Add the hashtag link, and give the link a name exactly how it will appear on your menu, then click Add to Menu.
- Save your updates and go checkout your new navigation!